Artificial Swarm Control
By carrying out an artificial swarm procedure you can benefit from another colony and possibly prevent your bees from swarming. There are many methods of doing this but this method is most probably the easiest and most straightforward. This method can also create another colony without affecting the honey flow and the later harvest.
There are many reasons why bees swarm, this can be due to lack of room in the brood, an old queen which is unable to create enough queen substance for all the bees and a breed of bees that are swarmy by nature.
This is probably the most commonly used method of carrying out artificial swarm control. The rule of thumb is to master one method before trying others, do not try to attempt various methods because you could confuse yourself, or at worst even loose your bees.
The method described will hopefully maintain the maximum amount of foraging bees with the queen who can continue to lay eggs without interrupting the honey flow. The key to success is to carry out careful inspections and to ensure you don’t miss seeing any queen cells.
If during an inspection you see a queen cell (unsealed) containing larvae, its time to carry out an artificial swarm procedure. When a queen cell is found do not shake any bees off the comb because this is likely to damage or injure the developing queen. Gently push the bees aside with your finger or use a bee brush (brush with very soft bristle) so you can see the whole comb and look to see if there are more queen cells.
After checking each comb in the brood box, note which frame has a queen cell or cells. This can be done with a marker pen, making a mark on the top of the frame directly above the cell or by using coloured drawing pins.
The roof, supers and queen excluder would have already been removed, so in order to carry out the artificial swarm procedure you will need a brood box and floor, full set of frames preferably with drawn comb, but if not with foundation, crownboard and roof.


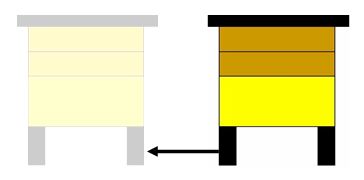
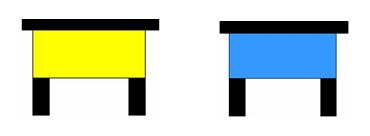
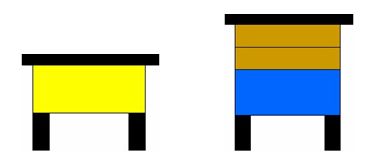
3. Check the colony in the yellow hive. Take a frame with the queen and brood in various stages, ensure there are no queen cells and put it into the middle of the blue hive, also put a frame of drawn comb either side of this frame so the queen can start laying straightaway. Remember the blue hive is in the original place of the yellow hive.
4. Ensure there is food reserves on the combs of the yellow hive and replace the removed frames with the three removed earlier. This hive is now left with nursery bees, queen cells and some foraging bees. Replace the crown board and roof. Do not feed straight away, wait a couple of days. Feeding sugar syrup immediately could cause robbing. For brood promotion use a 50/50 mix.
5. All the bees flying will return to the blue hive thinking it’s the yellow original hive. The nursery bees will bring on the queen cells in the yellow hive until one is hatched or selected.

After seven days, usually one day before the new virgin queen is due to emerge from the cell, follow these guidelines:

8. Check the blue hive to see if the old queen has continued to lay and there are no queen cells.
9. After another fourteen to twenty-one days check the yellow hive to see if the new queen has been mated and is laying.
10. If the weather has been bad or there is no sign of eggs or larvae be prepared to re-unite the two hives. This can sometimes happen if the queen cannot fly to mate. Once you know the queen is laying in the yellow hive you can either unite the two hives and remove the old queen or increase your number of colonies.
